Why people search for a fossil identifier
When someone types "fossil identifier" into a search bar they usually want three things: a quick answer to what they found, reliable photo-based identification, and practical steps to confirm or preserve the specimen. That intent mixes curiosity with conservation and sometimes with urgency — you may be on a tide edge with ten minutes before the water covers the exposure, or standing over a slab in a museum lab trying to confirm genus-level features.
What this guide delivers
- Clear photo-based ID techniques and visual cues (color, size, shape, texture, patterns)
- Practical beach, bone and brachiopod identification tips
- Comparison keys for common confusing pairs (shell vs brachiopod, bone vs mineral)
- Guidance on tools, apps and safety — including how to use Orvik as an AI-powered visual aid
How fossils form and the major fossil types
Understanding formation helps with identification. Fossils represent biological remains altered by burial, mineralization and time. Ages run from the early Cambrian (about 541 million years ago) through the Cenozoic (the last 66 million years), and the preservation style strongly influences appearance.
Common fossilization pathways
- Permineralization: mineral-rich water deposits silica, calcite or iron in pore spaces (common in wood and bone)
- Molds and casts: the original shell dissolves leaving a negative impression or later a cast
- Carbonization: thin film of carbon preserves leaves or soft tissues
- Replacement: original material is replaced molecule-by-molecule (pyritization is one example)
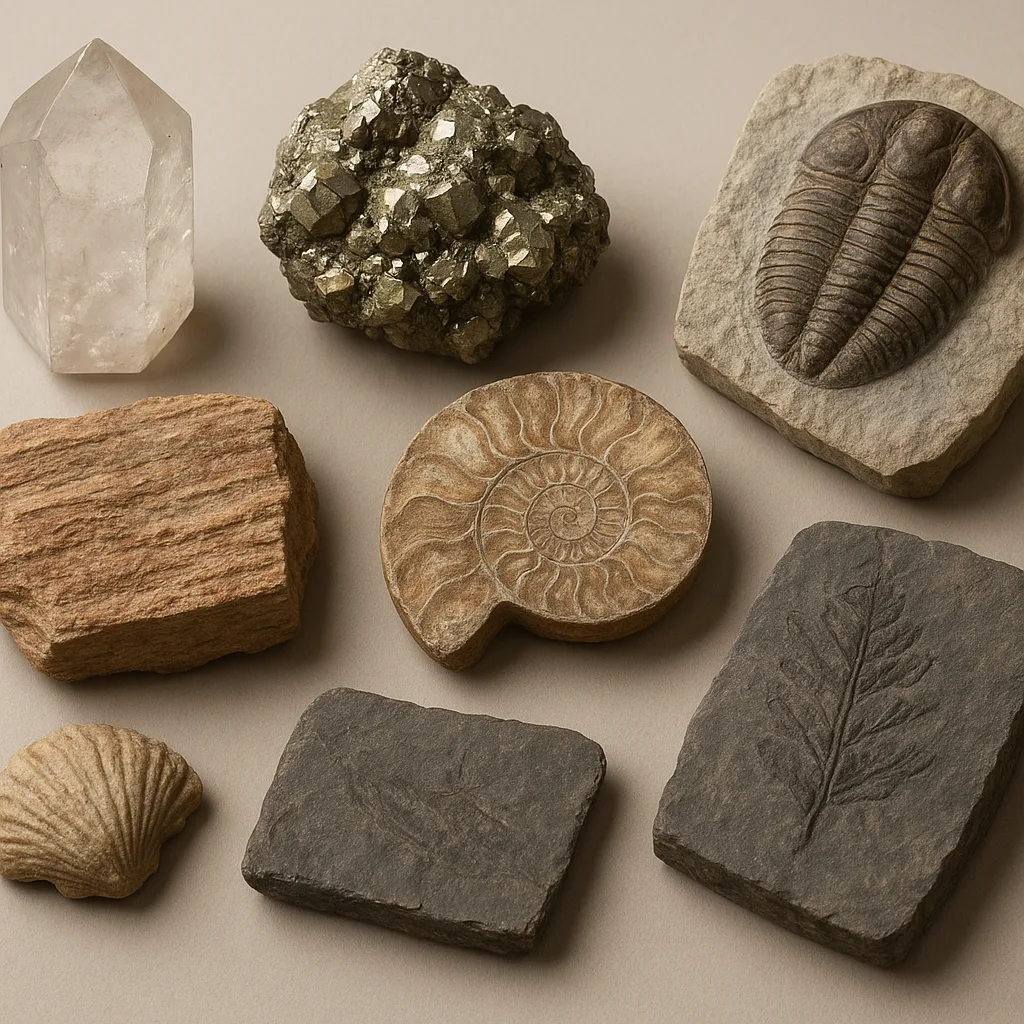
Major fossil groups to recognize
- Invertebrate shells: Bivalvia (clams), Gastropoda (snails), Brachiopoda (lamp shells), Ammonoidea (ammonites)
- Arthropods: Trilobita (trilobites)
- Vertebrate hard parts: teeth, bones, scales
- Plant fossils: leaves, stems, and petrified wood
- Trace fossils: burrows, tracks, coprolites (fossil dung)
Fossil identification by photo: step-by-step
Photo-based identification has become very effective with high-resolution images and AI tools. The quality of the image often determines whether you get a genus-level ID or only a broad group. Follow these steps to produce usable photos for experts or apps like Orvik.
For more on this topic, see our guide on How to Identify Any Rock in the Field.
How to photograph a fossil for ID
- Lighting: use diffuse light. Overcast daylight or a white sheet will reduce shadows and reveal surface texture.
- Scale: include a ruler, coin or a measurement scale. Indicate millimeters or centimeters; many small fossils are 2-20 mm and need scale to distinguish species.
- Angles: capture dorsal, ventral, lateral and an oblique close-up of any diagnostic feature such as hinge teeth, growth lines or sutures.
- Resolution: 12 MP or greater is ideal; crop after taking photos rather than zooming in optically.
- Context: a shot of the surrounding rock, bedding plane, or beach exposure helps determine stratigraphy and age.
Visual cues to note in photos
- Color and luster: fossils may be dark brown, black, or cream depending on mineral replacement; original shell aragonite rarely survives older than Pleistocene without recrystallization
- Texture: fine concentric growth lines on brachiopods vs smooth porcelain-like bivalve interiors
- Symmetry: brachiopods have bilateral symmetry perpendicular to the hinge; bivalves have mirror symmetry across the valves
- Sutures and ornament: ammonite suture patterns are highly diagnostic (complex frilled lines), while gastropods show spiral ridges and keels
Using AI tools like Orvik
- Submit multiple angles for higher-confidence matches
- Combine Orvik's suggestions with your field notes (location, matrix, strata) to narrow identifications
- Remember AI is a starting point: cross-check with published keys or a local paleontologist for rare specimens
Beach fossil identification: common finds and tips
Beaches are among the most productive places to find accessible fossils: tides erode cliffs and expose new material. Common finds depend on geology and coast: Jurassic coastlines yield ammonites and belemnites, while Miocene and Pleistocene deposits yield shark teeth and marine mammal bones.
Typical beach fossils by simple categories
- Teeth: shark teeth (Selachimorpha), fish teeth (Actinopterygii). Size 2 mm to >70 mm for large Carcharocles megalodon fragments.
- Shells: bivalves and gastropods, often worn and polished by sand abrasion.
- Cephalopods: ammonites (coiled, often 1–50 cm diameter) and belemnite rostra (cylindrical guards 1–10 cm).
- Bone fragments: marine mammal rib or whale ear bones (dense, heavy), often 3–30 cm fragments.
- Trace fossils: burrows and trackways preserved in tidal flats.
Beach-specific identification tips
- Fresh break vs water-polished surface: a freshly broken fossil shows internal structure and sharper edges; a water-polished piece will have a smoothed surface.
- Weight and density: bone fossils are lighter and more porous than typical mineral nodules; petrified wood is heavy and may show cellular textures under a hand lens.
- Matrix clues: glauconitic greens indicate marine shelf deposits; calcite-rich chalk suggests Cretaceous age.
Bone fossil identification and dinosaur teeth chart
Distinguishing bone from rock and recognizing teeth types are frequent challenges. Bones preserve cancellous (spongy) texture internally and often show cortical bone density. Teeth have enamel that resists weathering and may show microstriations or serrations.
You may also find our article on Field Guide to Rock Identification helpful.
Visual and tactile cues for bone vs mineral
- Pore structure: cross-sections often reveal a honeycomb of trabeculae in bone
- Flex: genuine fossil bone is brittle but will not ring like metal nodules
- Color zoning: internal color can differ from the outer mineral crust; broken surfaces reveal interior textures
Chart: how to tell common teeth types apart
- Shark tooth (Selachimorpha): triangular to blade-like, smooth or finely serrated cutting edge, central pulp cavity rarely visible, enameloid glossy black, brown or gray, size from 2 mm up to 170 mm for large species.
- Theropod dinosaur tooth (Theropoda): recurved, blade-like with pronounced serrations (denticles) on both edges. Serration density often 4–20 per 5 mm depending on family; typically hollow pulp cavity visible in broken cross-section.
- Crocodilian tooth (Crocodylia): conical, slightly curved, blunt apex, surface often with vertical striations; usually thicker cross-section than theropod teeth.
- Fish tooth (Actinopterygii): small, peg-like or pavement teeth for crushing; may show wear facets and distinct enamel banding.
Practical measurements and microscopy
- Measure crown height, basal width, and curvature radius. Record serration density per 5 mm for dinosaur teeth.
- Use a 10x hand lens to inspect enamel and denticles; a 40x microscope reveals micro-wear and growth lines useful for species-level ID.
Brachiopod fossil identification and brachiopod vs bivalve comparison
Brachiopods (Phylum Brachiopoda) are marine invertebrates with two valves that look like bivalve shells but are a distinct lineage. Many brachiopods peaked in diversity during the Paleozoic; common genera include Lingula (still extant) and Rhynchonellida.
Key visual distinctions
- Symmetry axis: brachiopods have bilateral symmetry perpendicular to the hingeline; bivalves are symmetrical across the hinge.
- Hinge and muscle scars: brachiopods have a pedicle opening and internal brachial supports; bivalves show ligament scars and adductor muscle impressions on each valve.
- Surface ornament: brachiopods often have strong radial ribs or punctae; bivalves frequently show concentric growth lines.
Brachiopod identification tips
- Measure length-to-width ratio; many brachiopods are longer than wide or vice versa depending on family. For example, Terebratulida shells often measure 10–50 mm with smooth surfaces and a short hinge line.
- Check for a pedicle foramen — a hole or notch near the beak suggests a pedicle-bearing brachiopod like Lingula.
- Note the fossil's age and locality: Ordovician-Silurian rocks are rich in brachiopods; the presence of trilobites nearby is another clue to Paleozoic strata.
Collecting, conservation, safety and legality
Responsible collecting balances curiosity with conservation and legality. Laws differ by country and region; many state parks, protected coastlines and private lands require permits or prohibit fossil removal.
You might also be interested in Goji Berries: A Field Guide to the Red Superfruit.
Related reading: Identifying Limestone: The Basics.
Practical collecting and preservation tips
- Always check local laws and land ownership before collecting; coastal erosion areas may be protected.
- Use hand tools: geological hammer, chisels, brushes and a small pry bar. Avoid rock-breaking without high-confidence legal allowance.
- Stabilize fragile specimens with consolidated storage: a 5% solution of Paraloid B-72 in acetone is a standard consolidant used by museums.
- Label your finds with location coordinates, stratigraphic bed, date, and collector name. This metadata is crucial for scientific value.
Safety and toxicity warnings
- Wear eye protection and gloves when splitting rock; flying chips are hazardous.
- Some fossils are pyritized (iron sulfide) and can oxidize to sulfuric acid over time; handle with care and avoid storing in humid environments.
- Avoid licking or handling fossils with bare hands before washing — some matrices contain heavy metals or arsenic-bearing minerals, particularly in sulfide-rich shales.
- Be cautious on cliffs and tide-swept shores; check tide charts and never work alone on unstable cliffs.
Tools, references and next steps for accurate IDs
Combining field skills, reference literature and modern tools will get you from tentative ID to a robust identification. Use measured data, high-quality photos and comparison with vetted collections.
Essential tools and references
- Field tools: 30 cm ruler, hand lens 10x, GPS or smartphone for coordinates, geological hammer and chisels
- Reference books: regional field guides and format-specific keys such as The Fossil Book of North America or regional geological survey bulletins
- Online databases: Paleobiology Database, museum collections, and local university collections
Using Orvik and other digital aids
- Orvik, an AI-powered visual identification app, is useful for fast preliminary identifications from photos and can prioritize likely taxa to check against local stratigraphy.
- Use Orvik alongside literature and local experts; AI suggests starting points but cannot replace physical inspection for rare or scientifically important specimens.
- When sharing images with online communities or experts, provide metadata: GPS coordinates, rock type, bedding orientation, and scale.
Conclusion
Finding a fossil is the start of a detective story. A good fossil identifier process combines careful photography, measurable features, knowledge of formation and locality, and the right tools. Whether you use an app like Orvik to screen photos, a hand lens on a beach, or a museum key in a lab, the most reliable identifications come from combining methods. Be safe, be legal, and record the context — that information is often more valuable than the fossil itself.
Frequently Asked Questions
- How accurate are photo-based fossil identifications?
- Photo IDs are reliable for group-level identification and often genus-level if photos include scale, multiple angles, and context. Species-level often needs microscopic or internal features.
- What is the best way to photograph a fossil for ID?
- Use diffuse lighting, include a scale (mm/cm), take multiple angles (dorsal, ventral, lateral, close-up), and a contextual shot of the bedding or beach exposure.
- How can I tell a brachiopod from a bivalve?
- Brachiopods have bilateral symmetry across each valve and often a pedicle opening; bivalves are mirror-symmetrical between left and right valves and show adductor muscle scars.
- Are shark teeth different from dinosaur teeth?
- Yes. Shark teeth are often triangular, have enameloid, and may be serrated; theropod dinosaur teeth are recurved with distinct serrations (denticles) and a visible pulp cavity in cross-section.
- Is it legal to collect fossils on beaches?
- Laws vary. Many public lands and beaches have restrictions. Always verify local regulations and obtain permits where required; never collect from protected sites.
- How should I store fragile fossils?
- Keep specimens dry, cushioned with acid-free tissue, and consolidated with museum-grade consolidants like Paraloid B-72 if necessary. Label each specimen with location and date.
- Can AI apps replace an expert?
- AI apps such as Orvik provide fast preliminary IDs and useful suggestions but do not replace physical examination for important or rare specimens.