If you've ever picked up a rock on a trail and wondered "what is this?", you're not alone. People searching to identify rocks want practical, reliable steps they can use in the field and at home: visual cues (color, grain, texture), simple tests (hardness, acid, magnetism), habitat clues, and comparison rules to tell look-alikes apart. This guide—written like a field manual—gives specific measurements, scientific names, and repeatable techniques so you can identify rocks with confidence. For quick photo-based checks, tools like Orvik (an AI-powered visual identification app) can speed up matching and help validate your field notes.
Understanding Rock Basics
Rocks are aggregates of minerals and are classified into three major groups based on how they form: igneous, sedimentary, and metamorphic. Knowing the group narrows identification dramatically.
Major rock types
- Igneous: Formed from cooled magma or lava. Examples: granite, basalt, obsidian. Typical features: interlocking crystals, vesicles (gas bubbles), glassy textures.
- Sedimentary: Formed by deposition of particles or precipitation of minerals. Examples: sandstone, shale, limestone. Typical features: layering (bedding), fossils, clastic grains.
- Metamorphic: Rocks altered by heat and pressure. Examples: gneiss, schist, marble. Typical features: foliation (banding), recrystallization.
Basic mineral building blocks
- Quartz (SiO2): Hardness 7, specific gravity ~2.65, conchoidal fracture, glassy luster.
- Calcite (CaCO3): Hardness 3, reacts with dilute HCl, rhombohedral cleavage, specific gravity 2.71.
- Feldspars (orthoclase and plagioclase): Hardness ~6, two-direction cleavage at ~90° (orthoclase) or striations (plagioclase).
- Micas (biotite, muscovite): Perfect basal cleavage producing thin sheets; biotite is dark, muscovite silvery.
Understanding the constituent minerals allows you to interpret texture and origin. For instance, a coarse-grained interlocking texture with visible quartz and feldspar crystals almost always indicates a plutonic igneous rock such as granite.
Field Identification Techniques
Combine visual observation with simple, safe tests to increase certainty. Below are reliable field techniques with specific steps and expected outcomes.
For more on this topic, see our guide on How to Identify Any Rock in the Field.
Visual cues: color, grain size, and texture
- Color: Note overall color and mottling. Granite commonly appears pink, white, or gray with visible crystals; basalt is dark gray to black.
- Grain size: Measure roughly with your eye—grain sizes are classified as:
- Clay: <0.0039 mm
- Silt: 0.0039–0.0625 mm
- Sand: 0.0625–2 mm
- Gravel: >2 mm
- Texture: Identify glassy (obsidian), porphyritic (large crystals in a fine matrix), vesicular (bubbly pumice or scoria), or foliated (layered metamorphic).
Hands-on tests: hardness, streak, acid, magnetism
- Hardness (Mohs scale): Carry a set of reference tools: a fingernail (~2.5), copper penny (~3.5), steel nail (~5.5), glass (~5.5). Scratch the mineral—if it scratches glass, hardness >5.5. Quartz (7) will scratch glass and steel.
- Streak test: Rub the rock on unglazed porcelain to see the powdered color. Hematite leaves reddish-brown streaks; pyrite leaves greenish-black to brownish-black streak.
- Acid test: Place a drop of dilute hydrochloric acid (10% HCl) or household vinegar on a fresh surface. Calcite (limestone) fizzes vigorously; dolomite reacts weakly unless powdered. Safety: always wear eye protection and gloves; see safety section.
- Magnetism: A small magnet tests for magnetite and some iron-rich meteorites. Strong attraction suggests magnetite or iron-nickel content.
Recording habitat and context
- Note the rock's location: streambed, outcrop, roadside, talus slope—context often indicates origin (e.g., rounded pebbles in river beds are sedimentary clasts).
- Altitude and geology maps: Bedrock maps or digital geological maps can help narrow possibilities—granites on shields and continental cores, basalts in flood basalt provinces and oceanic crust.
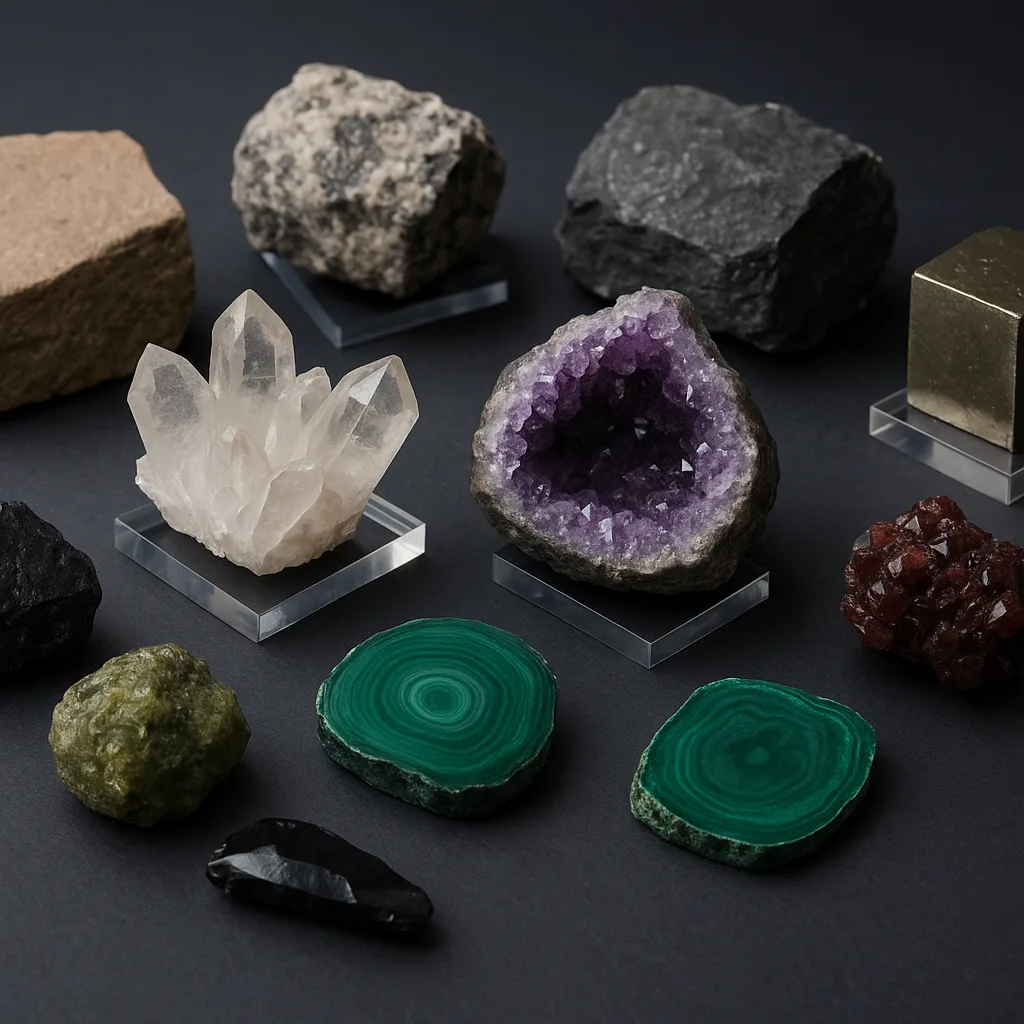
Common Rocks and How to Identify Them
Here are field-friendly profiles for the most commonly encountered rocks, with visual cues, measurements, habitat notes, and distribution.
Granite (Igneous, Plutonic)
- Appearance: Coarse-grained (phaneritic), crystals 1–10 mm often visible. Colors range from pink (orthoclase feldspar) to gray with white quartz and black biotite or amphibole.
- Key tests: Hardness 6–7, does not react with acid, specific gravity ~2.63–2.75.
- Habitat/distribution: Common in continental shields and batholiths (e.g., Sierra Nevada, Canadian Shield).
Basalt (Igneous, Volcanic)
- Appearance: Fine-grained (aphanitic), dark gray to black, may be vesicular. Crystals often too small to see without magnification.
- Key tests: Dense (specific gravity ~2.9–3.1), may be magnetic if rich in magnetite.
- Habitat/distribution: Oceanic crust, flood basalts (Deccan Traps, Columbia River), volcanic flows.
Sandstone (Sedimentary)
- Appearance: Clastic rock composed of sand-sized grains (0.0625–2 mm). Often tan, red, or brown. Grains usually quartz or feldspar cemented by silica or calcite.
- Key tests: Gritty feel, may disintegrate into individual sand grains. Porosity varies.
- Habitat/distribution: Beach, dune, and fluvial deposits; common in sedimentary basins worldwide.
Shale (Sedimentary)
- Appearance: Fine-grained, fissile (splits into thin layers), colors grey, black, or brown.
- Key tests: Smooth to touch, breaks into thin sheets along bedding planes.
- Habitat/distribution: Quiet water environments (lakes, deep marine basins).
Limestone and Marble (Sedimentary vs Metamorphic)
- Limestone: Typically composed of calcite; reacts with dilute HCl; often contains fossils; variable hardness ~3.
- Marble: Metamorphosed limestone: crystalline calcite texture, harder and denser, may show recrystallized grains and swirled patterns.
- Habitat/distribution: Limestones form in shallow warm seas; marbles occur in metamorphic belts where limestone underwent heat and pressure.
Gneiss and Schist (Metamorphic)
- Gneiss: Banded foliation with alternating light and dark mineral bands; coarse-grained; often derived from granite or sedimentary protoliths.
- Schist: Medium-to-large mica crystals giving a glittery sheen; pronounced foliation; may contain garnet porphyroblasts.
- Habitat/distribution: Mountain roots and orogenic belts (e.g., Himalaya margins, Appalachian metamorphic terrains).
Obsidian, Pumice, and Scoria (Volcanic Glasses)
- Obsidian: Glassy, conchoidal fracture, usually black or dark brown; very sharp edges.
- Pumice: Extremely vesicular, very low density (may float), light-colored (white to light gray).
- Scoria: Dark-colored vesicular rock, heavier than pumice, often red-brown due to oxidation of iron.
Practical Field Workflow: Step-by-Step
Follow a consistent workflow to minimize error. Use this checklist in the field; many rock hunters print a small card or save a note template on their phone.
You may also find our article on Granite: Field Guide to a Classic Rock helpful.
- Observe the context: Note the outcrop, sedimentary layering, or loose clast location. Is the rock rounded (transported) or angular (in situ)?
- Photograph carefully: Take at least three images—overall context, a hand-held scale (coin or a ruler), and a close-up showing texture. For AI apps like Orvik, clear, well-lit photos increase accuracy.
- Visual inspection: Record color, grain size (mm), visible minerals, luster, and any fossils or vesicles.
- Field tests: Perform hardness, streak, magnet, and acid tests as appropriate. Record results.
- Reference and compare: Use a field guide, geological map, or an app (Orvik) to compare your observations and images. Note likely matches and confidence levels.
- Collect responsibly: If collecting, follow local laws and best-practice etiquette—label specimens with location, GPS coordinates (latitude/longitude), date, and a short description.
Tips for photographing rocks for AI identification
- Use natural light; avoid harsh shadows. Early morning/late afternoon light is ideal.
- Include a scale object (penny, ruler). Take photos at multiple distances.
- Capture texture and any diagnostic features like crystals, banding, fossils, or vesicles.
- For apps like Orvik, add location metadata and any field-test notes to improve model suggestions.
Comparison Guides: How to Tell Similar Rocks Apart
Many misidentifications happen because rocks look similar at first glance. Below are side-by-side cues to keep on hand.
Granite vs Gneiss
- Granite: Equigranular coarse crystals (quartz, feldspar, mica), no systematic banding.
- Gneiss: Distinctive alternating light/dark bands (gneissic banding) produced by mineral segregation under high-grade metamorphism.
Limestone vs Marble
- Limestone: May contain fossils, reacts strongly to dilute HCl on fresh surfaces, typically softer (hardness ~3).
- Marble: Recrystallized calcite, granular crystalline texture, may not show fossils, reaction with acid still occurs but can be less vigorous on polished surfaces.
Basalt vs Scoria
- Basalt: Dense, fine-grained, may have vesicles but typically heavier (specific gravity ~3.0).
- Scoria: Highly vesicular (many cavities), darker red-brown or black, much lighter than solid basalt though not as light as pumice.
Sandstone vs Shale
- Sandstone: Gritty, sand-sized grains visible, breaks into blocky pieces.
- Shale: Smooth, fissile (splits into sheets), composed of silt and clay—no gritty feel.
Quartz vs Calcite
- Quartz: Hardness 7, will scratch glass, no reaction with acid, conchoidal fracture.
- Calcite: Hardness 3, effervesces with dilute HCl, rhombohedral cleavage.
Safety, Ethics, and Legal Notes
Rock collecting and testing can present hazards—from sharp edges to toxic minerals. Follow these safety rules and ethical guidelines.
You might also be interested in Mastering Coin Identification: A Field Guide.
Related reading: Inside Igneous Rock: Formation, Types & Field ID.
Safety precautions
- Wear protective eyewear and gloves when hammering or using acid. Always perform acid tests outdoors or under a fume hood. Use only dilute acid (10% HCl) and neutralize spills with baking soda (sodium bicarbonate).
- Beware of sharp edges: obsidian and freshly fractured rocks can cut skin.
- Toxic minerals: Handle arsenic-bearing minerals (e.g., arsenopyrite), mercury ores (e.g., cinnabar), and asbestos-bearing rocks with extreme caution—avoid breathing dust and wash hands after handling.
- Magnetized fragments and heavy rocks: Lift with legs, secure footing on slopes.
Ethics and legal considerations
- Obtain permission before collecting on private land or protected areas—many national parks prohibit removal of natural items.
- Minimize disturbance: collect small samples, fill holes, and respect archaeological sites.
- Label specimens: Good scientific practice is to record GPS coordinates, date, and context for each specimen.
Conclusion
To identify rocks reliably, combine observational skill with simple field tests and contextual information about habitat and geology. Start with broad classifications (igneous, sedimentary, metamorphic), then narrow down using texture, grain size, mineralogy, and diagnostic tests like acid and hardness. Comparison rules—such as quartz vs calcite or granite vs gneiss—help eliminate common confusions. For faster matching and to cross-check your field notes, use AI tools like Orvik; such apps are especially helpful when you have clear photos and location data. Above all, practice: the more specimens you examine and document, the more intuitive identification becomes.
Happy rock hunting—observe carefully, test safely, and record precisely.
Frequently Asked Questions
- What is the first step to identify a rock?
- Start with context and visual inspection: note where it was found (stream, outcrop), overall color, grain size, and texture. This typically reveals whether the rock is igneous, sedimentary, or metamorphic.
- How can I tell quartz from calcite in the field?
- Use hardness and acid tests: quartz has Mohs hardness 7 and scratches glass; calcite is softer (hardness 3) and effervesces (fizzes) with dilute hydrochloric acid or strong vinegar.
- Are there safe field tests for identifying rocks?
- Yes—visual inspection, hardness with a penny or glass, streak on unglazed porcelain, magnet test, and dilute acid for carbonate rocks. Wear eye protection and use gloves for acid tests.
- Can my phone identify rocks?
- AI apps can suggest likely matches from photos and metadata. Apps like Orvik perform well when images are clear and include a scale and location, but always cross-check with field tests.
- How do I distinguish sandstone from shale?
- Sandstone is gritty and composed of visible sand-sized grains (0.0625–2 mm) and breaks into blocks; shale is fine-grained, smooth, fissile (splits into thin sheets) and often darker.
- Is it legal to collect rocks in parks?
- Many national and state parks prohibit removing natural objects. Always check local regulations and obtain permission when collecting on private or protected lands.
- What minerals are hazardous to handle?
- Arsenic-bearing minerals (e.g., arsenopyrite), mercury ores (cinnabar), and asbestos-bearing minerals can be hazardous. Avoid creating dust, wear gloves, and wash hands after handling.